I love playing RPGs that allow me to manage my party. Equipping them with certain gear for certain battles to ensure a victory. Skyrim offers this sort of playstyle with one follower but three's a party. Having the option to give your characters stronger gear (or weaker gear at first) gives you a similar dynamic to the most popular RPGs out there. This build has been a blast to play. Reminding me a lot of a combination between Skyrim, The Legend of Zelda, and Final Fantasy.
The Hero
The Backstory
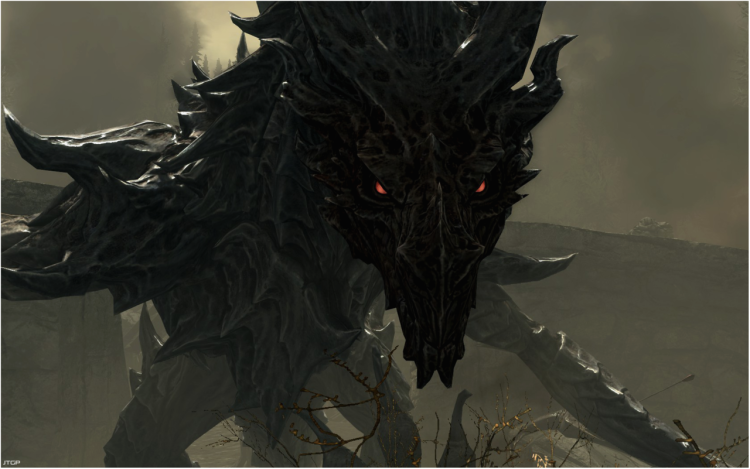
Cold... and black, if I could sum up the dream that's been haunting me for years its this. A haunting cry cuts through me like a knife through butter, chilling every bone in my body.. It always ends the same way too, I'm frozen to the spot as a massive black beast with glowing red eyes stares at me. It seems like an eternity every time, me staring up at the creature as it gazes hungrily at me. Then without warning the beast swoops down.. its gaping maw swallowing me whole.
A shout splits the night in the quiet town of Bruma as I wake up in a chilly sweat, shaking from head to toe from the nightmare. This time it felt more real! I could almost feel the creature's breath on my face before waking up that time, for too many nights this beast has robbed me of sleep and peace of mind. With a grumble I gaze out the window as the sun begins creeping over the horizon, time to get to work. I sigh, blinking the tiredness out of my eyes and grab the woodcutter axe leaning next to the doorway.
My job isn't a bad one. Chopping wood helps put food on the table but deep down I can't help but feel I was meant for something more. Swinging an axe at a tree certainly has its merits. It's a good way to get exercise. I head out of town to the forest with a bard's tune on my lips, and my head in the clouds.
The forest feels... different today. Normally all the birds are chirping, the foxes run playfully down the road chasing vixens no doubt. Not today though, it feels almost empty. Then the most terrifying sound I could possibly imagine pierces through the tree canopies.
It can't be! The forlorn cry from my dream! Here!? Impossible! There it is again! I look up just at the right time to see a black shadow fly swiftly above the trees, unleashing another cry that turns my legs to jelly. It's headed north! The creature that's robbed me of sleep for years is now a reality flying straight for Skyrim! To this day I'm not sure if it was curiosity or absolute terror of never knowing but
without thinking I cut through the forest, heading north chasing after the winged demon.
He/She may not realize it yet but they're about to become a very important part of Elder Scrolls history, saving Skyrim and the world from Alduin. It will be a difficult road for the woodcutter, but an epic journey. Their strength is not measured in the strength of their sword arm but their ability to lead others in combat. This is the key to victory.
The Build
This build will focus on micro-managing a party of 3. Equipping them with better gear as your skills improve and of course keeping them alive. Your role in the party is a Cleric, the harrowing experience that has haunted your character for such a long time has unlocked some inherent magical abilities when you became Dragonborn, this will give you the tools necessary to save the world.
The Party
Your two followers Golldir and Brynjolf have been carefully selected to ensure that you're able to get into the fun stuff as soon as possible. Golldir is the Tank and Brynjolf is the DPS. (NOTE: If anyone in your party is killed, you must reload your last save)
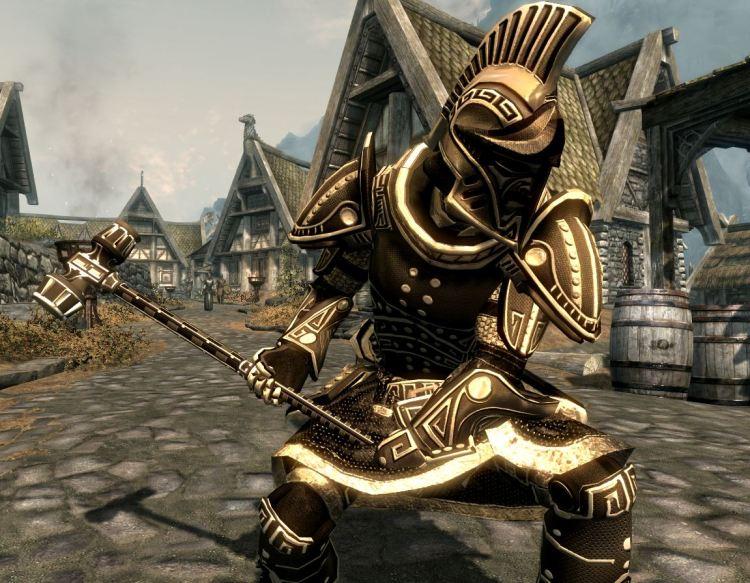 The Cleric, our Hero
Race: Imperial
Stone: Lord for the men, Lady for the women, or the Steed Stone
Weapon: 1 Handed Mace
Armor: Heavy
Combat Skills: Restoration, Heavy Armor, 1 Handed
Party Skills: Smithing, Enchanting, Illusion, (Pickpocketing)
Stats: 3/1/0 You will be the back row healer/support so to speak. Having a high magick will cover the expensive costs later on and ensure that your party members don't drop dead!
 The Tank, Golldir
Race: Nord
Weapon: 1h Sword/Shield
Armor: Heavy
Stats: http://www.uesp.net/wiki/Skyrim:Golldir
Golldir can be found in Hilgrund's Tomb which is slightly Northeast of Whiterun. An evil necromancer with a dark secret has invaded his family's resting area and needs to be vanquished! Help Golldir do this, and he'll be happy to follow you to the edges of Skyrim.
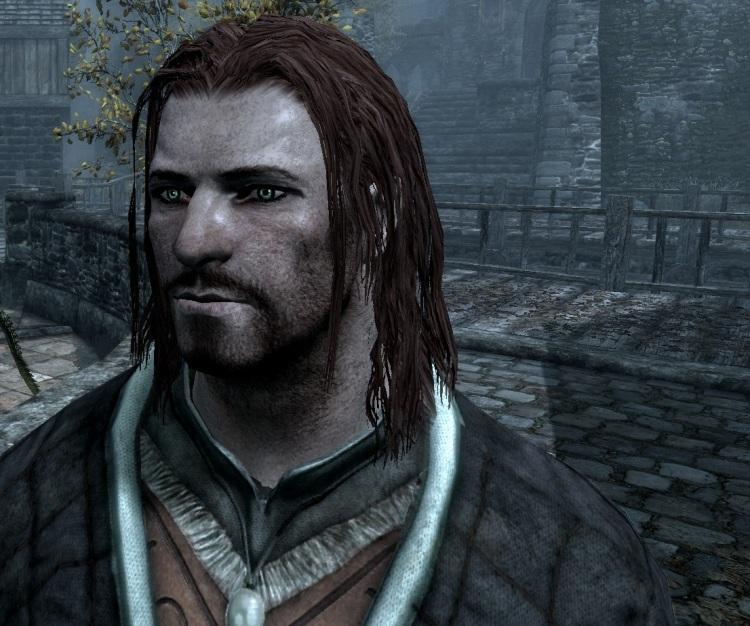 The DPS, Brynjolf
Race: Nord
Weapon: Sword/Daggers
Armor: Light
Stats: http://www.uesp.net/wiki/Skyrim:Brynjolf
Brynjolf is a member of the thieves guild and makes his home in Riften. While his intentions are anything but noble, his ability in combat is unmatched! As an integral part of the Hero's destiny, his cloak and dagger methods uncover something shocking indeed!
Gaining Brynjolf as a Follower
Proceed through the Thieves Guild quests until you reach Trinity Restored. After talking to Karliah outside Nightingale Hall, he starts following you.
There's a few reasons I chose to go with Brynjolf for the DPS instead of Delphine.
1) Finishing the Thieves Guild questline isn't required.
2) Getting to the part of the Thieves Guild questline where he becomes available as a follower also grants the Nightingale Armor, which is a perfect fit for him.
3) The amount of combat necessary. The main campaign questline involves so much more combat than the Thieves Guild quests which are a lot more snooping around. Going through the Thieves Guild also allows the uncovering of certain secret documents which further the Hero's story.
Micro-Managing the Party
The method of equipping two different followers is slightly more complicated than the one. You can change the permanent follower's inventory without an issue. The second follower however requires a more unique approach...
Your first goal as the Hero is achieving 100 Pickpocketing so we can get the perks Misdirection and Perfect Touch, these perks will allow us to change and improve the gear that our second follower is wearing, the chance of us taking the gear to improve it is at 90% if you max the Pickpocketing tree, but just to be safe be sure you save your game before trying to take gear.
Getting to 100 is a lot easier than I originally thought it would be. Simply go to the Carriage Driver outside Whiterun, slip coin into his pocket and while the inventory screen is still up, take it back out. If you succeed, Wait 1 hour. The game will autosave for you. Do it again, if you fail. Reload your autosave. As long as you constantly improve your pickpocketing when you can, you'll have 100 pickpocketing in no time! Once you have that done, we can get into the fun stuff!
Here's a short guide to speed your pickpocketing adventures up: The best way to level it up is to find a carriage driver, like Bjorlam in Whiterun. Save the game first! Open his inventory and go to your 'misc' section. Deposit 200 gold then, without exiting the inventory, steal it back. From skill level 5-20 you should do about 50 gold. From 21-25 you should do about 200 gold. From 26-40 skill do 300 gold. From 41-65 do about 520 gold. From 66-80 do 600 gold. From 81-100 steal around 900 to 1000 gold. Each time you take the money back you will go up by about 1 pickpocket level. Note: Use as many perks in pickpocket as you can, so you don't get caught as much. This can also be done with guards in a hold. The guard next to Belethor's goods, during the early morning hours is an excellent place to level. Just be sure to keep some extra coin on you to pay your bounty.
Improving the Party (Ability Points)
An important thing you should know about this build is how you improve your skills. You won't be spamming Dwarven Bows, Iron Daggers, or Leather Bracers to increase your Smithing. The Gold you pick up in combat are called Ability Points, and are to be used for training Party Skills. All the equipment you and your party will use, will be found by dungeon crawling, not by purchasing. This gives the feeling that you're playing an RPG where the best gear you can equip is found by 'grinding'.
The quality of the gear your party can equip depends entirely on how high into the Smithing tree you are. For instance if you happen to come across an Orcish dagger, your Thief can't equip it until your Smithing is at least level 50, you don't need the perk Orcish Smithing, just need to hit the 50 mark. This is going to result in some very intense battles while you race to improve your skills as the enemies become progressively more difficult.
Playing the Hero
The entire build is structured so that while maxing Pickpocketing will be quick and relatively painless, for a while you'll be sitting on quite a few perk points. Money will be tight as you try to figure out which school to work on first. Are you going to improve Smithing right away? Focus on Enchanting? Maybe improve your Illusion skills. There's many different doors to choose from. And as if that wasn't enough!
QUESTS
Completing your party not only gives you two party members, it also gives you a bunch of different places to go! WARNING: Spoilers ahead!
Chapter 1: The Party Destiny Built
After achieving 100 Pickpocketing, you go to bed exhausted with the tedious training, that night not only do you have the most comfortable sleep you've had in years. You also see a vision of a man. Following your visions have helped you this far. You wake up to warm sunshine and clinking of mead glasses. It's time to find this man.
Objective: Head to Hilgrunds Tomb Northeast of Whiterun and help Golldir defeat the wretched Necromancer.
Upon defeating the vile Necromancer, you find a journal on his person. Most of it is nonsense and gibberish. This man was seriously troubled!
"Yes, I did it! I raised my first zombie, my parents would give me a pat on the back if they had a brain to do so.. hehehe who's the failure now!? Ah.. the zombie has collapsed, such a waste indeed. No matter! I will get some rest and try again tomorrow."
"Last night a voice spoke to me, telling me what I must do to improve my Necromancy. Travel to Hilgrund's Tomb it said, plenty of bodies to practice on. That's a day's hike south from here. As soon as I enchant my dagger I will be on my way."
"Teeehheeeeee! IT WORKED MARVELOUSLY! I am surrounded by the animated dead. They've been walking around aimlessly for hours now without assistance. A local came down here from all the commotion the undead have been raising. I killed her and used her for my spells, AHH the voice is overpowering all my senses, I can hear nothing except a deep guttural voice saying the same thing over and over again "Riften"
"RIFTEN RIFTEN RIFTEN RIFTEN RIFTEN RIFTEN RIFTEN RIFTEN RIFTEN RIFTEN RIFTEN RIFTEN RIFTEN RIFTEN RIFTEN RIFTEN BRING THE ARMY HOME TO RIFTEN! FIND THE KEY! THE KEY!!! HE HE HE HEEEEE! TIME TO FEEEEEED THE ARMYYYYYYYYYY!"
Objective: Head to Riften and begin the Thieves Guild questline, proceed through quests to Trinity Restored

Chapter 2: The Scavenger Hunt
Late one night while running errands for the Thieves Guild, you come across some documents in a household mentioning a direct connection to Daedric Artifacts and the sudden presence of Dragons in Skyrim, you take the papers with you and carefully pour over their entire contents.
"For a few weeks I've been plagued by horrid dreams... dreams of my family members, my friends, my very children.. all being maimed by a force I could neither see nor attack. Perhaps it was those restless nights that drove me to figure out exactly what was tormenting me."
"I would spend days in the library rifling through every book on Daedra I could find. It's all that damn key's fault! This all started when it mysteriously wound up on my doorstep. Now the information I found in those horrid books is confirmed with the return of Dragons. There seems to be a connection between the two."
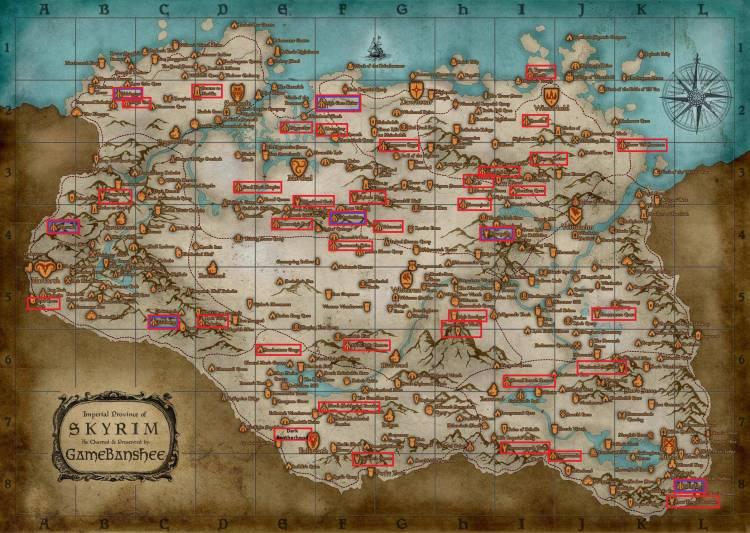
The Last Known Location of all the Daedric Weapons in Skyrim by Hold (A map falls out between the pages)
Meridia's Artifact - Haafingar
Mephala's Artifact - Whiterun
Molag Bal's Arifact - The Reach
Mehrunes Dagon's Artifact - The Pale
Sanguine's Artifact - Eastmarch
Vaermina's Artifact - The Pale
Malacath's Artifact - The Rift
Sheogorath's Artifact - Haafingar
"I thought uncovering the truth about these evil things would cure me of my nightmares but it only made them worse! My mind continues to dwindle into a numb mass of apathy as the severe lack of sleep begins to cloud my judgment. It's the key! I must save my family! Tonight I intend to take a boat out and cast the key to the bottom of Lake Honrich, hopefully this will free me of the key's curse."
Objective: Collect all 8 Daedric Weapons
Tier Weaponry (Sidequest)
You made a lot of friends in the Thieves Guild, one of the perks to being a leader. Before you left to continue your journey, a handful of thieves have heard rumors of powerful weapons that could help you on your journey and marked them on your map for you. Tier gear is completely optional
Cleric Tier Gear - In the hands of the Cleric, these items which are inherently evil, have been cleansed through Purity and are a great asset in completing your journey.
Azura's Star, The Black Star -- Tier 1, An artifact that will help improve Enchanting
Location: Azura's Shrine
Mace of Molag Bal -- Tier 2, A Mace that further improves the speed for Enchanting
Location: Markarth
Ebony Mail -- Tier 3, An Armor that greatly assists damage output in battle
Location: Knifepoint Ridge
Tank Tier Shields - Tanks love shields. Shields are the thin wall of protection between you and certain doom. Going a bit out of your way to get some high quality shields is going to certainly help you out in the long run.
Targe of the Blooded -- Tier 1, This shield inflicts bleeding damage upon bashing
Location: Alftand
Shield of Ysgramor -- Tier 2, This shield has been enchanted to mitigate magical damage
Location: Ysgramor's Tomb
Spellbreaker -- Tier 3, While blocking, this Shield protects from magical damage by up to 50 points.
Location: Shrine of Peryite
DPS Tier Weapons - The harder your DPS hits, the less damage your tank takes, which means less magick for you to spend making sure he stays in the fight. There's a few weapons that work perfectly for Brynjolf if you're willing to go out of your way. It'll certainly be worth your while.
Bloodthorn -- Tier 1, Fills soul gems
Location: Hag's End
Valdr's Lucky Dagger -- Tier 2, 25% chance to critical
Location: Moss Mother Cavern
Blade of Woe --- Tier 3, Aborbs 10 points of Health
Location: ???? In the corner of the map there's multiple locations scribbled out followed by "Dark Brotherhood" and circled at least 4 times.
(Make sure you pickpocket the Blade of Woe before its given to you as a reward, having dual Blades of Woe on your Thief is pretty sweet)
Chapter 3: The Dragon's Guard
Once the Eight Daedric Weapons were together, the tools of war lifted off the ground where they were placed. Spinning slowly at first then more chaoticly, creating a blur of steel. Within the maelstrom of death, the whispers of blades and sheer force began to cut through the night. Coming together in some sort of dreadful harmony... then something happened that no one could have guessed.
"Speak", the vicious weapons sang, "Why have you summoned me"
The Hero explains the sudden presence of dragons and the connection they have to Daedric Princes.
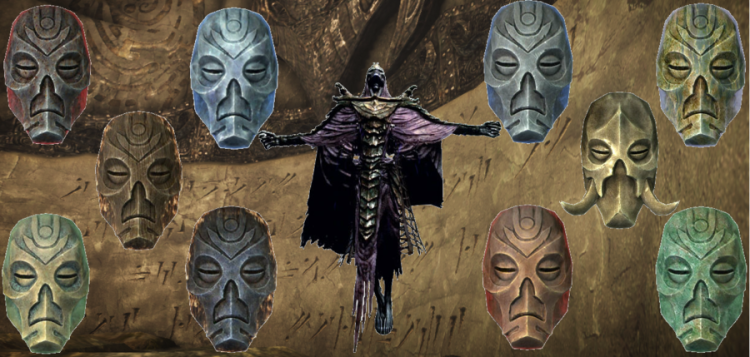
The weapons laugh a cold, merciless laugh, "Alduin cannot be stopped, he is protected by the 8 Dragon Priests. They've sacrificed their Head Priest Konahrik. That is how Alduin is so powerful. If you wish to stop him. You must first free Konahrik."
A sudden gust of wind, or what felt like wind suddenly picks up. Our precious map is lifted out of our hands and gets caught in the updraft, flying right into the whirling dervish of possessed weapons.
"The Dragon Priests are very powerful undead beings. You better be prepared. Destroy the arrogant fools and crush Alduin, this is not his world to eat"
The voice laughs maniacally as the map flies out of the maelstrom of blades unharmed except for small, magical colored cuts with where the Dragon Priests can be located. The weapons gradually begin to slow down and finally stop in midair a moment, before clattering to the cold, hard ground.
Objective: Defeat all 8 Dragon Priests
X - Shock
X - Fire
X - Frost
Locations of all Dragon Priests are on the map that hold the Daedric Artifact locations
X - Valthume, the Nordic Ruin
>< - Shearpoint, a Dragon Lair
X - Labyrinthian
X - Ragnvald, the Nordic Ruin
X - Forelhost, the Nordic Ruin
X - High Gate Ruins, the Nordic Ruin
X - Volskygge, The Nordic Ruin
X - Labyrinthian - None
(At this point it is time to do the main campaign and finish Alduin once and for all)
X - A final X is floating above the map - Shock, Fire, and Frost
The Hero's Skills
There are two different categories of skills. Instead of Major/Minor, we have Party/Combat skills. Combat Skills can be raised with Ability Points while party Skills MUST be raised through Ability Points.
Party Skills
These 3 skills are the means you have available to improve the overall effectiveness of your party. All 3 are improved through Ability Points (Gold) How are you going to spend your points?
Smithing - Arguably your most important skill. Raising this skill not only allows you to improve the gear your party uses, but also allows you to equip better armor. (i.e. Steel, Dwarven, Orcish, etc) For instance, if you come across an Orcish Dagger in your travels, you cannot equip it to a party member until your Smithing reaches at least level 50.
Trainers
Adept - Ghorza gra-Bagol, Markarth
Expert - Balimund, Riften
Master - Eorlund Gray-Mane, Whiterun
Smithing Perks
Steel
Dwarven
Orcish
Ebony
Daedric
Dragon
Enchanting - Ensuring that your armor is properly enchanted (especially once you reach the Dragon Priests) is going to be the difference between victory and defeat. Enchanting is also improved through Ability Points, similar to Smithing.
While the Hero can wear any Enchantment, followers are only effected by certain enchantments, this is a list of all the Enchantments that can benefit a party member:
Follower Enchants
Fortify Health
Fortify Health Regeneration
Fortify Heavy Armor
Fortify Light Armor
Fortify Magicka
Fortify Stamina
Fortify Unarmed Damage
Muffle
Resist Fire
Resist Frost
Resist Magic
Resist Poison
Resist Shock
Waterbreathing
Fortify Carry Weight
Of course not all of these Enchants are going to be beneficial for your followers. As far as recommended enchants go, it's important to know what you're fighting before you get there. That's why the type of Dragon Priest has been marked on your map. For instance, going to a Fire Dragon Priest fight with Shock Resist gear on your Tank is not going to bode well.
A lot of the Daedric Weapon quests are filled with Undead that for the most part focus on melee/ranged attacks. Improving your party's Heavy and Light Armor abilities should help immensely.
Note: While each point of Armor Rating improves your Armor Score by 0.4%, for NPCs it is improved by 1.5% per point. This makes the skill extremely powerful for the Tank, being able to absorb damage like a sponge will certainly free you up to cast some offensive spells for a change
Trainers
Expert - Sergius Turrianus, College of Winterhold
Master - Hamal, Markarth
Enchanting Perks
Enchanter V
Fire Enchanter
Frost Enchanter
Storm Enchanter
Insightful Enchanter
Corpus Enchanter
Extra Effect
Illusion - As a natural leader, the Hero has the ability to improve the combat prowess of the party, increasing their health, stamina and with practice, even their damage! Illusion is improved through Ability Points, similar to Smithing and Enchanting.
Spells: Courage, Rally, Call to Arms
Trainers
Expert - Atub, Largashbur
Master - Drevis Neloran, College of Winterhold
Illusion Perks
Novice-Master
Dual Casting
Combat Skills
These are the skills you'll be using exclusively in combat situations, you also have the option to use Ability Points to improve them as well. Remember, as a Cleric even though you do have heavy armor, you're still without a shield. Restoration is by far your most useful skill, and the Perks have been designed to reflect that.
Restoration - All those tormenting nights where you couldn't sleep were for good reason it seems. That fear that laid dormant within you has transformed into something benevolent and beautiful, giving you the ability to heal others and utterly destroy the undead. This skill will
get the most extensive use, as keeping your party in the fight is an important job, and you're the only one that can do it.
Endgame the Cleric becomes extremely powerful against undead, making the Nordic Ruins that the Dragon Priests lurk in that much easier. It's important not to get too carried away though, your primary role is making sure your party stay alive.
Restoration Spells: Healing, Healing Hands, Heal Other, Turn Undead, Circle of Protection, Grand Healing, Repel Undead, Repel Greater Undead, Bane of the Undead, Guardian Circle
Restoration Perks
Novice-Master
Dual Casting
Respite
Regeneration
Recovery
Heavy Armor - As a true Cleric, you don Heavy Armor into battle. While this provides MUCH more protection than a healer's robes. It does make regeneration of Magick a bit more difficult, which makes it important to heal only when necessary. Spamming heal on a party member is going
to drain your reserves very quickly, and when the time comes where you actually do need to heal him. You may not be able to.
Heavy Armor Perks
Juggernaut III
1 Handed - Clerics are not offensive machines and the perk selection has been chosen to reflect exactly that. Your hammer does however have the ability to crush the strongest armor, having the potential to ignore up to 75% of it! When you come upon a particularly stubborn enemy
that refuses to die. Running in and getting a solid hit with the hammer might help topple the beast.
1 Handed Perks
Armsman I
Bonebreaker III
Level 24 Perks | Level 50 Perks
Strategies for the Hero
At first you will have very little to work with in regards to healing the team or buffing. So at first, you'll be the heavy armor meatshield! Once you do start building up your Party Skills and have your full team, casting Courage will improve the survivability of your party so you don't have to constantly heal them in battle. It is wise to cast this before a fight or otherwise you run the risk of buffing your enemy as well!
In battle, always have at least one Healing Hands out. If you're in a particularly rough fight, it's alright to put your mace away and dual cast til your party is at full health again. Once the tide has begun to turn, re-equip your mace and start clobbering. The Key to playing a good Hero is not to get tunnel vision and focus on the enemy. While your tank is durable, he's not invincible. Healing will keep him happy and upright.
As a Cleric, you have the unique ability to soothe everyone once a day (Imperial Racial). It is wise to use this only in the most dire of situations. If you find you're running out of Magick and your tank is about to bite the big one. Cast your racial and give him some time to breathe.
The DPS cannot die, but he can take a knee in battle which is just as bad. The damage your party dishes out requires both the Tank and the DPS, not only the tank. Having Dual Blades of Woe will help the DPS sustain themselves if you need to focus on the tank, making it an effective off-tank from time to time. Again, the key to victory is ensuring that everyone in your party is fighting fit.
 Pocket Tank - This isn't an ability, more of a technique that I've been resorting to a lot throughout my playthrough. Until you find some decent weapons, your Cleric simply isn't going to be doing a lot of damage. Once my smithing got high enough for Ebony I was able to do moderate damage.
Anyways, in certain fights, (especially ones with Draugr Deathlords) the enemies completely ignore your party and focus on you. Since your party isn't getting attacked and you have a TON of mana, you can put your mace away and just keep healing yourself through the battle. This is also a great way to increase your Restoration to 40 for Respite, which is a huge benefit for your party. Just be mindful of additional mobs attacking your party.
Special Abilities
 Quick Motivational Speech - Leaders are known to rally even the most exhausted soldiers with a heartfelt speech. The only problem is the dead have ears. Give them something to run away from first, then give them something to cry about.
Abilities Needed: Turn Undead + Rally/Courage
 The Cleric's Mulligan - If you find yourself in a battle that doesn't seem to be going quite in your favor, quickly cast Voice of the Emperor to calm everyone down, retreat backwards slightly so you're outside the range of the enemy and cast Grand Healing, this will allow your party to recuperate and jump back into battle once the calming effect wears off, effectively turning the tide! But remember, you only get one!
Abilities Needed: Voice of the Emperor + Grand Healing
 The Cleric's Cleansing - Occasionally enemies will find a way around your tank and DPS and attack you directly. While this certainly makes it more difficult to do your job. With the proper gear, you can really make them pay for their foolishness, banishing them to an eternity of benevolence.
Abilities Needed: Ebony Mail + Azura's Star + Mace of Molag Bal
Thank you to Constantine for his amazing Party Leader build
which was a great inspiration for this one.

I love playing RPGs that allow me to manage my party. Equipping them with certain gear for certain battles to ensure a victory. Skyrim offers this sort of playstyle with one follower but three's a party. Having the option to give your characters stronger gear (or weaker gear at first) gives you a similar dynamic to the most popular RPGs out there. This build has been a blast to play. Reminding me a lot of a combination between Skyrim, The Legend of Zelda, and Final Fantasy.
The Hero
The Backstory
Cold... and black, if I could sum up the dream that's been haunting me for years its this. A haunting cry cuts through me like a knife through butter, chilling every bone in my body.. It always ends the same way too, I'm frozen to the spot as a massive black beast with glowing red eyes stares at me. It seems like an eternity every time, me staring up at the creature as it gazes hungrily at me. Then without warning the beast swoops down.. its gaping maw swallowing me whole.
A shout splits the night in the quiet town of Bruma as I wake up in a chilly sweat, shaking from head to toe from the nightmare. This time it felt more real! I could almost feel the creature's breath on my face before waking up that time, for too many nights this beast has robbed me of sleep and peace of mind. With a grumble I gaze out the window as the sun begins creeping over the horizon, time to get to work. I sigh, blinking the tiredness out of my eyes and grab the woodcutter axe leaning next to the doorway.
My job isn't a bad one. Chopping wood helps put food on the table but deep down I can't help but feel I was meant for something more. Swinging an axe at a tree certainly has its merits. It's a good way to get exercise. I head out of town to the forest with a bard's tune on my lips, and my head in the clouds.
The forest feels... different today. Normally all the birds are chirping, the foxes run playfully down the road chasing vixens no doubt. Not today though, it feels almost empty. Then the most terrifying sound I could possibly imagine pierces through the tree canopies.
It can't be! The forlorn cry from my dream! Here!? Impossible! There it is again! I look up just at the right time to see a black shadow fly swiftly above the trees, unleashing another cry that turns my legs to jelly. It's headed north! The creature that's robbed me of sleep for years is now a reality flying straight for Skyrim! To this day I'm not sure if it was curiosity or absolute terror of never knowing but
without thinking I cut through the forest, heading north chasing after the winged demon.
He/She may not realize it yet but they're about to become a very important part of Elder Scrolls history, saving Skyrim and the world from Alduin. It will be a difficult road for the woodcutter, but an epic journey. Their strength is not measured in the strength of their sword arm but their ability to lead others in combat. This is the key to victory.
The Build
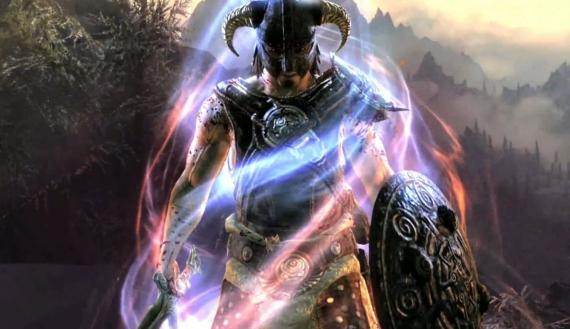
This build will focus on micro-managing a party of 3. Equipping them with better gear as your skills improve and of course keeping them alive. Your role in the party is a Cleric, the harrowing experience that has haunted your character for such a long time has unlocked some inherent magical abilities when you became Dragonborn, this will give you the tools necessary to save the world.
The Party
Your two followers Golldir and Brynjolf have been carefully selected to ensure that you're able to get into the fun stuff as soon as possible. Golldir is the Tank and Brynjolf is the DPS. (NOTE: If anyone in your party is killed, you must reload your last save)
The Cleric, our Hero
Race: Imperial
Stone: Lord for the men, Lady for the women, or the Steed Stone
Weapon: 1 Handed Mace
Armor: Heavy
Combat Skills: Restoration, Heavy Armor, 1 Handed
Party Skills: Smithing, Enchanting, Illusion, (Pickpocketing)
Stats: 3/1/0 You will be the back row healer/support so to speak. Having a high magick will cover the expensive costs later on and ensure that your party members don't drop dead!
The Tank, Golldir
Race: Nord
Weapon: 1h Sword/Shield
Armor: Heavy
Stats: http://www.uesp.net/wiki/Skyrim:Golldir
Golldir can be found in Hilgrund's Tomb which is slightly Northeast of Whiterun. An evil necromancer with a dark secret has invaded his family's resting area and needs to be vanquished! Help Golldir do this, and he'll be happy to follow you to the edges of Skyrim.
The DPS, Brynjolf
Race: Nord
Weapon: Sword/Daggers
Armor: Light
Stats: http://www.uesp.net/wiki/Skyrim:Brynjolf
Brynjolf is a member of the thieves guild and makes his home in Riften. While his intentions are anything but noble, his ability in combat is unmatched! As an integral part of the Hero's destiny, his cloak and dagger methods uncover something shocking indeed!
Gaining Brynjolf as a Follower
Proceed through the Thieves Guild quests until you reach Trinity Restored. After talking to Karliah outside Nightingale Hall, he starts following you.
There's a few reasons I chose to go with Brynjolf for the DPS instead of Delphine.
1) Finishing the Thieves Guild questline isn't required.
2) Getting to the part of the Thieves Guild questline where he becomes available as a follower also grants the Nightingale Armor, which is a perfect fit for him.
3) The amount of combat necessary. The main campaign questline involves so much more combat than the Thieves Guild quests which are a lot more snooping around. Going through the Thieves Guild also allows the uncovering of certain secret documents which further the Hero's story.
Micro-Managing the Party
The method of equipping two different followers is slightly more complicated than the one. You can change the permanent follower's inventory without an issue. The second follower however requires a more unique approach...
Your first goal as the Hero is achieving 100 Pickpocketing so we can get the perks Misdirection and Perfect Touch, these perks will allow us to change and improve the gear that our second follower is wearing, the chance of us taking the gear to improve it is at 90% if you max the Pickpocketing tree, but just to be safe be sure you save your game before trying to take gear.
Getting to 100 is a lot easier than I originally thought it would be. Simply go to the Carriage Driver outside Whiterun, slip coin into his pocket and while the inventory screen is still up, take it back out. If you succeed, Wait 1 hour. The game will autosave for you. Do it again, if you fail. Reload your autosave. As long as you constantly improve your pickpocketing when you can, you'll have 100 pickpocketing in no time! Once you have that done, we can get into the fun stuff!
Here's a short guide to speed your pickpocketing adventures up: The best way to level it up is to find a carriage driver, like Bjorlam in Whiterun. Save the game first! Open his inventory and go to your 'misc' section. Deposit 200 gold then, without exiting the inventory, steal it back. From skill level 5-20 you should do about 50 gold. From 21-25 you should do about 200 gold. From 26-40 skill do 300 gold. From 41-65 do about 520 gold. From 66-80 do 600 gold. From 81-100 steal around 900 to 1000 gold. Each time you take the money back you will go up by about 1 pickpocket level. Note: Use as many perks in pickpocket as you can, so you don't get caught as much. This can also be done with guards in a hold. The guard next to Belethor's goods, during the early morning hours is an excellent place to level. Just be sure to keep some extra coin on you to pay your bounty.
Improving the Party (Ability Points)
An important thing you should know about this build is how you improve your skills. You won't be spamming Dwarven Bows, Iron Daggers, or Leather Bracers to increase your Smithing. The Gold you pick up in combat are called Ability Points, and are to be used for training Party Skills. All the equipment you and your party will use, will be found by dungeon crawling, not by purchasing. This gives the feeling that you're playing an RPG where the best gear you can equip is found by 'grinding'.
The quality of the gear your party can equip depends entirely on how high into the Smithing tree you are. For instance if you happen to come across an Orcish dagger, your Thief can't equip it until your Smithing is at least level 50, you don't need the perk Orcish Smithing, just need to hit the 50 mark. This is going to result in some very intense battles while you race to improve your skills as the enemies become progressively more difficult.
Playing the Hero
The entire build is structured so that while maxing Pickpocketing will be quick and relatively painless, for a while you'll be sitting on quite a few perk points. Money will be tight as you try to figure out which school to work on first. Are you going to improve Smithing right away? Focus on Enchanting? Maybe improve your Illusion skills. There's many different doors to choose from. And as if that wasn't enough!
QUESTS
Completing your party not only gives you two party members, it also gives you a bunch of different places to go! WARNING: Spoilers ahead!
Chapter 1: The Party Destiny Built
After achieving 100 Pickpocketing, you go to bed exhausted with the tedious training, that night not only do you have the most comfortable sleep you've had in years. You also see a vision of a man. Following your visions have helped you this far. You wake up to warm sunshine and clinking of mead glasses. It's time to find this man.
Objective: Head to Hilgrunds Tomb Northeast of Whiterun and help Golldir defeat the wretched Necromancer.
Upon defeating the vile Necromancer, you find a journal on his person. Most of it is nonsense and gibberish. This man was seriously troubled!
"Yes, I did it! I raised my first zombie, my parents would give me a pat on the back if they had a brain to do so.. hehehe who's the failure now!? Ah.. the zombie has collapsed, such a waste indeed. No matter! I will get some rest and try again tomorrow."
"Last night a voice spoke to me, telling me what I must do to improve my Necromancy. Travel to Hilgrund's Tomb it said, plenty of bodies to practice on. That's a day's hike south from here. As soon as I enchant my dagger I will be on my way."
"Teeehheeeeee! IT WORKED MARVELOUSLY! I am surrounded by the animated dead. They've been walking around aimlessly for hours now without assistance. A local came down here from all the commotion the undead have been raising. I killed her and used her for my spells, AHH the voice is overpowering all my senses, I can hear nothing except a deep guttural voice saying the same thing over and over again "Riften"
"RIFTEN RIFTEN RIFTEN RIFTEN RIFTEN RIFTEN RIFTEN RIFTEN RIFTEN RIFTEN RIFTEN RIFTEN RIFTEN RIFTEN RIFTEN RIFTEN BRING THE ARMY HOME TO RIFTEN! FIND THE KEY! THE KEY!!! HE HE HE HEEEEE! TIME TO FEEEEEED THE ARMYYYYYYYYYY!"
Objective: Head to Riften and begin the Thieves Guild questline, proceed through quests to Trinity Restored
Chapter 2: The Scavenger Hunt
Late one night while running errands for the Thieves Guild, you come across some documents in a household mentioning a direct connection to Daedric Artifacts and the sudden presence of Dragons in Skyrim, you take the papers with you and carefully pour over their entire contents.
"For a few weeks I've been plagued by horrid dreams... dreams of my family members, my friends, my very children.. all being maimed by a force I could neither see nor attack. Perhaps it was those restless nights that drove me to figure out exactly what was tormenting me."
"I would spend days in the library rifling through every book on Daedra I could find. It's all that damn key's fault! This all started when it mysteriously wound up on my doorstep. Now the information I found in those horrid books is confirmed with the return of Dragons. There seems to be a connection between the two."
The Last Known Location of all the Daedric Weapons in Skyrim by Hold (A map falls out between the pages)
Meridia's Artifact - Haafingar
Mephala's Artifact - Whiterun
Molag Bal's Arifact - The Reach
Mehrunes Dagon's Artifact - The Pale
Sanguine's Artifact - Eastmarch
Vaermina's Artifact - The Pale
Malacath's Artifact - The Rift
Sheogorath's Artifact - Haafingar
"I thought uncovering the truth about these evil things would cure me of my nightmares but it only made them worse! My mind continues to dwindle into a numb mass of apathy as the severe lack of sleep begins to cloud my judgment. It's the key! I must save my family! Tonight I intend to take a boat out and cast the key to the bottom of Lake Honrich, hopefully this will free me of the key's curse."
Objective: Collect all 8 Daedric Weapons
Tier Weaponry (Sidequest)
You made a lot of friends in the Thieves Guild, one of the perks to being a leader. Before you left to continue your journey, a handful of thieves have heard rumors of powerful weapons that could help you on your journey and marked them on your map for you. Tier gear is completely optional
Cleric Tier Gear - In the hands of the Cleric, these items which are inherently evil, have been cleansed through Purity and are a great asset in completing your journey.
Azura's Star, The Black Star -- Tier 1, An artifact that will help improve Enchanting
Location: Azura's Shrine
Mace of Molag Bal -- Tier 2, A Mace that further improves the speed for Enchanting
Location: Markarth
Ebony Mail -- Tier 3, An Armor that greatly assists damage output in battle
Location: Knifepoint Ridge
Tank Tier Shields - Tanks love shields. Shields are the thin wall of protection between you and certain doom. Going a bit out of your way to get some high quality shields is going to certainly help you out in the long run.
Targe of the Blooded -- Tier 1, This shield inflicts bleeding damage upon bashing
Location: Alftand
Shield of Ysgramor -- Tier 2, This shield has been enchanted to mitigate magical damage
Location: Ysgramor's Tomb
Spellbreaker -- Tier 3, While blocking, this Shield protects from magical damage by up to 50 points.
Location: Shrine of Peryite
DPS Tier Weapons - The harder your DPS hits, the less damage your tank takes, which means less magick for you to spend making sure he stays in the fight. There's a few weapons that work perfectly for Brynjolf if you're willing to go out of your way. It'll certainly be worth your while.
Bloodthorn -- Tier 1, Fills soul gems
Location: Hag's End
Valdr's Lucky Dagger -- Tier 2, 25% chance to critical
Location: Moss Mother Cavern
Blade of Woe --- Tier 3, Aborbs 10 points of Health
Location: ???? In the corner of the map there's multiple locations scribbled out followed by "Dark Brotherhood" and circled at least 4 times.
(Make sure you pickpocket the Blade of Woe before its given to you as a reward, having dual Blades of Woe on your Thief is pretty sweet)
Chapter 3: The Dragon's Guard
Once the Eight Daedric Weapons were together, the tools of war lifted off the ground where they were placed. Spinning slowly at first then more chaoticly, creating a blur of steel. Within the maelstrom of death, the whispers of blades and sheer force began to cut through the night. Coming together in some sort of dreadful harmony... then something happened that no one could have guessed.
"Speak", the vicious weapons sang, "Why have you summoned me"
The Hero explains the sudden presence of dragons and the connection they have to Daedric Princes.
The weapons laugh a cold, merciless laugh, "Alduin cannot be stopped, he is protected by the 8 Dragon Priests. They've sacrificed their Head Priest Konahrik. That is how Alduin is so powerful. If you wish to stop him. You must first free Konahrik."
A sudden gust of wind, or what felt like wind suddenly picks up. Our precious map is lifted out of our hands and gets caught in the updraft, flying right into the whirling dervish of possessed weapons.
"The Dragon Priests are very powerful undead beings. You better be prepared. Destroy the arrogant fools and crush Alduin, this is not his world to eat"
The voice laughs maniacally as the map flies out of the maelstrom of blades unharmed except for small, magical colored cuts with where the Dragon Priests can be located. The weapons gradually begin to slow down and finally stop in midair a moment, before clattering to the cold, hard ground.
Objective: Defeat all 8 Dragon Priests
X - Shock
X - Fire
X - Frost
Locations of all Dragon Priests are on the map that hold the Daedric Artifact locations
X - Valthume, the Nordic Ruin
>< - Shearpoint, a Dragon Lair
X - Labyrinthian
X - Ragnvald, the Nordic Ruin
X - Forelhost, the Nordic Ruin
X - High Gate Ruins, the Nordic Ruin
X - Volskygge, The Nordic Ruin
X - Labyrinthian - None
(At this point it is time to do the main campaign and finish Alduin once and for all)
X - A final X is floating above the map - Shock, Fire, and Frost
The Hero's Skills
There are two different categories of skills. Instead of Major/Minor, we have Party/Combat skills. Combat Skills can be raised with Ability Points while party Skills MUST be raised through Ability Points.
Party Skills
These 3 skills are the means you have available to improve the overall effectiveness of your party. All 3 are improved through Ability Points (Gold) How are you going to spend your points?
Smithing - Arguably your most important skill. Raising this skill not only allows you to improve the gear your party uses, but also allows you to equip better armor. (i.e. Steel, Dwarven, Orcish, etc) For instance, if you come across an Orcish Dagger in your travels, you cannot equip it to a party member until your Smithing reaches at least level 50.
Trainers
Adept - Ghorza gra-Bagol, Markarth
Expert - Balimund, Riften
Master - Eorlund Gray-Mane, Whiterun
Smithing Perks
Steel
Dwarven
Orcish
Ebony
Daedric
Dragon
Enchanting - Ensuring that your armor is properly enchanted (especially once you reach the Dragon Priests) is going to be the difference between victory and defeat. Enchanting is also improved through Ability Points, similar to Smithing.
While the Hero can wear any Enchantment, followers are only effected by certain enchantments, this is a list of all the Enchantments that can benefit a party member:
Follower Enchants
Fortify Health
Fortify Health Regeneration
Fortify Heavy Armor
Fortify Light Armor
Fortify Magicka
Fortify Stamina
Fortify Unarmed Damage
Muffle
Resist Fire
Resist Frost
Resist Magic
Resist Poison
Resist Shock
Waterbreathing
Fortify Carry Weight
Of course not all of these Enchants are going to be beneficial for your followers. As far as recommended enchants go, it's important to know what you're fighting before you get there. That's why the type of Dragon Priest has been marked on your map. For instance, going to a Fire Dragon Priest fight with Shock Resist gear on your Tank is not going to bode well.
A lot of the Daedric Weapon quests are filled with Undead that for the most part focus on melee/ranged attacks. Improving your party's Heavy and Light Armor abilities should help immensely.
Note: While each point of Armor Rating improves your Armor Score by 0.4%, for NPCs it is improved by 1.5% per point. This makes the skill extremely powerful for the Tank, being able to absorb damage like a sponge will certainly free you up to cast some offensive spells for a change
Trainers
Expert - Sergius Turrianus, College of Winterhold
Master - Hamal, Markarth
Enchanting Perks
Enchanter V
Fire Enchanter
Frost Enchanter
Storm Enchanter
Insightful Enchanter
Corpus Enchanter
Extra Effect
Illusion - As a natural leader, the Hero has the ability to improve the combat prowess of the party, increasing their health, stamina and with practice, even their damage! Illusion is improved through Ability Points, similar to Smithing and Enchanting.
Spells: Courage, Rally, Call to Arms
Trainers
Expert - Atub, Largashbur
Master - Drevis Neloran, College of Winterhold
Illusion Perks
Novice-Master
Dual Casting
Combat Skills
These are the skills you'll be using exclusively in combat situations, you also have the option to use Ability Points to improve them as well. Remember, as a Cleric even though you do have heavy armor, you're still without a shield. Restoration is by far your most useful skill, and the Perks have been designed to reflect that.
Restoration - All those tormenting nights where you couldn't sleep were for good reason it seems. That fear that laid dormant within you has transformed into something benevolent and beautiful, giving you the ability to heal others and utterly destroy the undead. This skill will
get the most extensive use, as keeping your party in the fight is an important job, and you're the only one that can do it.
Endgame the Cleric becomes extremely powerful against undead, making the Nordic Ruins that the Dragon Priests lurk in that much easier. It's important not to get too carried away though, your primary role is making sure your party stay alive.
Restoration Spells: Healing, Healing Hands, Heal Other, Turn Undead, Circle of Protection, Grand Healing, Repel Undead, Repel Greater Undead, Bane of the Undead, Guardian Circle
Restoration Perks
Novice-Master
Dual Casting
Respite
Regeneration
Recovery
Heavy Armor - As a true Cleric, you don Heavy Armor into battle. While this provides MUCH more protection than a healer's robes. It does make regeneration of Magick a bit more difficult, which makes it important to heal only when necessary. Spamming heal on a party member is going
to drain your reserves very quickly, and when the time comes where you actually do need to heal him. You may not be able to.
Heavy Armor Perks
Juggernaut III
1 Handed - Clerics are not offensive machines and the perk selection has been chosen to reflect exactly that. Your hammer does however have the ability to crush the strongest armor, having the potential to ignore up to 75% of it! When you come upon a particularly stubborn enemy
that refuses to die. Running in and getting a solid hit with the hammer might help topple the beast.
1 Handed Perks
Armsman I
Bonebreaker III
Level 24 Perks | Level 50 Perks
Strategies for the Hero
At first you will have very little to work with in regards to healing the team or buffing. So at first, you'll be the heavy armor meatshield! Once you do start building up your Party Skills and have your full team, casting Courage will improve the survivability of your party so you don't have to constantly heal them in battle. It is wise to cast this before a fight or otherwise you run the risk of buffing your enemy as well!
In battle, always have at least one Healing Hands out. If you're in a particularly rough fight, it's alright to put your mace away and dual cast til your party is at full health again. Once the tide has begun to turn, re-equip your mace and start clobbering. The Key to playing a good Hero is not to get tunnel vision and focus on the enemy. While your tank is durable, he's not invincible. Healing will keep him happy and upright.
As a Cleric, you have the unique ability to soothe everyone once a day (Imperial Racial). It is wise to use this only in the most dire of situations. If you find you're running out of Magick and your tank is about to bite the big one. Cast your racial and give him some time to breathe.
The DPS cannot die, but he can take a knee in battle which is just as bad. The damage your party dishes out requires both the Tank and the DPS, not only the tank. Having Dual Blades of Woe will help the DPS sustain themselves if you need to focus on the tank, making it an effective off-tank from time to time. Again, the key to victory is ensuring that everyone in your party is fighting fit.
Pocket Tank - This isn't an ability, more of a technique that I've been resorting to a lot throughout my playthrough. Until you find some decent weapons, your Cleric simply isn't going to be doing a lot of damage. Once my smithing got high enough for Ebony I was able to do moderate damage.
Anyways, in certain fights, (especially ones with Draugr Deathlords) the enemies completely ignore your party and focus on you. Since your party isn't getting attacked and you have a TON of mana, you can put your mace away and just keep healing yourself through the battle. This is also a great way to increase your Restoration to 40 for Respite, which is a huge benefit for your party. Just be mindful of additional mobs attacking your party.
Special Abilities
Quick Motivational Speech - Leaders are known to rally even the most exhausted soldiers with a heartfelt speech. The only problem is the dead have ears. Give them something to run away from first, then give them something to cry about.
Abilities Needed: Turn Undead + Rally/Courage
The Cleric's Mulligan - If you find yourself in a battle that doesn't seem to be going quite in your favor, quickly cast Voice of the Emperor to calm everyone down, retreat backwards slightly so you're outside the range of the enemy and cast Grand Healing, this will allow your party to recuperate and jump back into battle once the calming effect wears off, effectively turning the tide! But remember, you only get one!
Abilities Needed: Voice of the Emperor + Grand Healing
The Cleric's Cleansing - Occasionally enemies will find a way around your tank and DPS and attack you directly. While this certainly makes it more difficult to do your job. With the proper gear, you can really make them pay for their foolishness, banishing them to an eternity of benevolence.
Abilities Needed: Ebony Mail + Azura's Star + Mace of Molag Bal
Thank you to Constantine for his amazing Party Leader build
which was a great inspiration for this one.


