Skyrim Character Building » Discussions
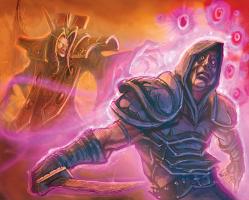
Character Build: The Mystic Enchanter
Tags: #Character Build Mage #Character Build Enchanter #Character Build Supporter #Rank:Bloodworks #SE Rank:Adept-
19 people like this
-

Greetings, my good folk, and welcome to my first ever character build. So, I've never been too keen on support builds in Skyrim. Somehow it felt...dull, as in it felt that all I did was heal my tank and pray it didn't fall, lest I'd be screwed. However, after reading Constantine's Party Leader, some ideas started to sprout: maybe I did not need to be a healer in order to effectively support. And so, after mixing my own elements, for the first time, I delved myself into the support role. The result is a very efficient, flexible mage, that is completely in charge of the flow of the battle, manipulating both allies and foes with buffs, debuffs and crowd control tools to not even need to use healing; using the power of the dead and Oblivion itself to power and craft powerful artifacts; and all in all centering around a spirit of adventure I thought I had long lost in the game. And boy, I can guarantee, that was one hell of a ride. Ladies and gentleman, I humbly (and proudly) present to you:


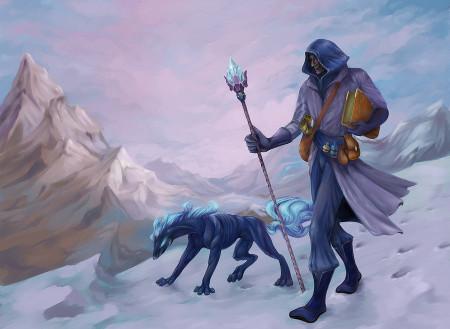
Enchanting always lured me, intrigued me. I was overjoyed when I got my lease to study in the Arcane University, finally able to understand, study, discover, and maybe even rival the legendary relycs of past masters. However, reality could have never been more different. While indeed practicing and perfecting my arts, the lack of field work was disheartening, at best. I yearned to learn, yes, but more than that, I learned that I wanted to explore. So, after some deliberation, I made my mind. I've learned the ancient northmen were among the most skilled enchanters, the tombs in which their artifacts lie untouched for the most part, due to their undead denizens. For someone who can also take advantage of the energy powering these undead in enchanting, the temptation is just too great. All I need is companion to complement my abilities (I'm not skilled in the ways of combat magic, or combat in general), but the Nords are renowned warriors as well. It's decided. Tomorrow, at dawn, I head North.

- Race: I went Breton: magic absorb/resist and automatic access to the Familiar summon (one of our most useful spells) sealed the deal for me. However, if you want to choose another race (Altmer comes to mind with their magicka and illusion boost), by all means, feel free to do so;
- Stats: 1/0/0 Yes, we are rolling all magicka here. You are a support, so if you need health to survive hits your follower should be tanking for you, you are playing it just plain wrong, and stamina is useless outside of carry weight bonus (which isn't as relevant since you can share the burden of all your loot anyway);
- Standing stone: The Mage (until enchanting hits 100) into the Atronach. An extra 50 magicka and spell absorption are great boosts for your character. As I'm on PC and use the USKP the Atronach doesn't mess with my summons, so I ran only with it, but if you don't use mods, you may want to put it on the aetherial crown for consistency, in which case I recommend you pick either the Lord or the Apprentice as the main stone (you may want to do it even with the USKP if you want, I just felt it unnecessary).
- Shouts: Marked for Death, Ice Form, Slow Time.
- Quests: College of Winterhold, Coming of Age, The Black Star, Blood on the Ice, Forbidden Legend, Wind and Sand, From the Ashes, Unearthed.
Skills


Enchanting: As the mystic enchanter it would be awkward to have it not be a main skill, to say the least. In all seriousness though, this skill is the heart and soul of this build, and should be prioritized. Between staff play and crafting gear to support our followers, this skill will be a passive one, but the most essential to you.
Illusion: One hell of a useful school, providing you with buffs and crowd control. As it is a perk-hungry school to remain effective through the game, I recommend you pay attention to your leveling, as Enchanting can power level you to the point the skill is useless. Spells: Courage Spells, Calm Spells, Fear Spells.
 Alteration: This school provides crazy good utility and more control options most of them more powerful than Illusion ones, specially in the late game and against certain enemies. Spells: Detect spells, Magelight, Ash shell, Paralyze, Ash rune.
 Destruction: Although we are not a DPS mage, and as such will not touch this school's spells much, it does add some interesting tools to our arsenal, allowing us to shut down mages and warriors alike with lightning and frost, and some enemy control. As it is not used much in gameplay, you will need to use trainers (not a big deal considering the money you will be making as an enchanter). Spells: Freeze, Frostbite, Frost Cloak, Sparks, Lighting Cloak, Whirlwind Cloak.
 Conjuration: Very lightly perked, as we will only use a few spells, but it is very much relevant to this build. Spells: Soul trap, Summon Familiar, Conjure Ash Guardian.
Followers

Companions are essential to this build: you are very squishy, and offer not so much in terms of damage output, so you need someone to protect you from harm and bring the pain to your enemies. With the limited array of enchantments that followers benefit from, heavily armored, sword-and-board followers work the best (more on that on the gear section). In my first playthrough I got Kharjo, and rolled with Lydia all the way on my second one, but anyone with a focus on heavy armor and sword-and-board will do. If you need a list to prospect potential recruits, click here.
Gear
 Although we are enchanters, we'll be using very little in terms of custom gear, instead focusing our crafting skills to boost our allies' prowess, effectively making enchanting a support skill, albeit a passive one. For ourselves, Skyrim has plenty of artifacts that an enchanter would like to put the hands on, and you will be scavenging many of them for learning and study, yes, but also for personal use.
Follower gear:
- Chest: Fortify heavy armor and health;
- Head: Ancient Helmet of the Unburned/Helm of Yngol;
- Gauntlets: Fortify heavy armor;
- Boots: Resist fire and frost;
- Ring: Resist magic and fortify health;
- Amulet: Resist magic and fortify heavy armor;
- Shield: Fortify health and resist magic;
- Weapons: Silver sword with fiery soul trap / Sword with absorb health and damage stamina;
- Potions: Bought of found potions of Restore Health;
This set will make our followers some real-deal tanks, boasting very high resistances to magic and physical attacks alike, as well as a hearty health pool. This, along with given found or bought (not crafted) potions of restore health will make sure that you don't need to worry about keeping your follower alive, and can focus more on controlling the battlefield. As for the weapons, each sword serves a purpose: the silver one can be enchanted from level 1 with a petty soul gem and be used for the rest of the game as your prime way to acquire souls to fuel your craft, while the other blade (just pick the best you can find at the time, by the end I was using ebony) will heal our follower and debuff enemies at melee combat, and as such is used in combat where you do not expect to gather souls or wants to add even more survivability to your ally in tougher fights.
Self equipment:
- Chest: College robes (best quality you can get) of either Illusion or Alteration;
- Amulet: Necromancer's amulet;
- Ring: Fortify Alteration and Illusion/Ahzidal's ring of arcana;
- Head: Mage's circlet;
- Boots: Fortify carry weight;
- Weapons: Staff of paralysis; Staff of Jyrick Gauldurson; Staff of Magnus; Grand staff of Repulsion;
While you could later on craft better gear for yourself, I found the above setup to be more than sufficient. With all points going to magicka, there is not so much need for cost-reduction and fortify magicka gear, so you can go by with purchased and quest-reward apparel, meaning that an utility enchantment such as carry weight is more useful for a custom enchanting slot. Whenever you use weapons it is going to be staffs, and each serve a purpose. The staff of Jyrick is a very interesting one, and is our main damage dealer when needed. It was chosen over other staffs for a couple of reasons: It has low charges, meaning you have to constantly recharge it, forcing you to evaluate and better manage your resources, while also training enchanting not only faster, but dynamically and actively; And unlike most other staffs, you don't need to hold it to release the bolt, but may simply tap, meaning you can chain very fast attacks by tapping in the right rhythm, allowing you to have some form of DPS when needed. The staff of paralysis is excellent to render tougher enemies helpless while your followers beat them to a pulp until we level Alteration. The staff of Magnus will make short work of mages and Dragons alike. And the staff of repulsion will allow us to either crowd control or stun lock the undead, the most common foe we will be facing.

Early Game
The start of the game is usually a pain for enchanter characters, as you have trouble making enough money to get started on your craft (God knows soul gems are expensive). Luckily, Librari's most excellent Golden Route will get you covered on the financial side of things, for the most part, so go read it, I'll wait. Read it? Good, welcome back. The one thing I suggest changing on his method is heading to Morthal instead of going to Meeko's Shack from Solitude. From there, go to Labyrinthian. Leave your follower on the base of the stairway and run past the trolls into the Labyrinth itself, and grab yourself four free staves! The fear, firebolt and repulsion staffs will be more than enough to help get you started on your first missions (we will be getting rid of them later, but that means extra cash selling them anyway), and won't raise any skills, which is useful early in the game so we may focus better on how to level our skills. Run back to your follower and then proceed to get Meeko. After gathering the gold you need to get started, you may dismiss Faendal and grab a tank follower whenever you feel like it (Uthgert is a nice option until you can get someone good with a shield).
Most of our key equipment, spells and enchantments can actually be acquired very early in the game. I recommend focusing on our staffs: Jyric's, Paralisys (there is one on Snapleg Cave) and Grand Repulsion (you can "borrow" the one from the bedroom of Winterhold's Jarl), the silver sword and fiery soul trap combo (enchant a silver sword with a petty soul gem and set the magnitude to the minimum: it enures that it can be recharged with only petty/lesser gems, while also having an absurd amount of charges), the Marked for Death shout (indispensable debuff tool), the Necromancers Amulet (+50 magicka boost that can be gained on level 1 plus a huge discount to our familiar), the absorb health enchantment (found in Folgunthur, guarantees you will never run out of gold and will be later on the main source of healing for our follower) and your starting spells, most notably: courage (base buff), calm, fear, summon familiar (if not breton), frostbite and detect life (quest reward for Infiltration, in Treva's Watch). With the tools listed, the actual gameplay won't be much different on the beginning from the end, as we will merely be unlocking more advanced tools to achieve the same goals using roughly the same methods.Combat
As mentioned, our main concern is to be in charge of the battlefield at all times. That means only fighting on our terms, maximizing our advantages and minimizing our disadvantages as much as we can. As such, the detect life (and later detect dead) spell is crucial, as it allow us to spot encounters in advance and plan accordingly. Once you detected the enemy, you may assume the roles of buffer, debuffer or crowd controller (DPS in some rare cases). Buffing is simple enough: just stack courage spells on your follower, however, the rest will depend heavily on the type of encounters we face.
 Against large groups crowd control is priority. It is only you and a loyal follower against the world, and even though he/she should be tough, numbers can overwhelm you if you are not careful, so whenever you are in a numerical disadvantage, your top priority is to take enemies out of the fight and even the scales. With mixed groups, focus first on ranged opponents, whether they are mages or archers: as your tank will be engaged on melee with the rest of the group, you need to guarantee ranged foes do as little free damage on him/her as possible until your follower is finished with the melee and can take care of them. After that, you may focus on melee opponents if you think they may overrun your ally. You have plenty of controlling options, and for a long time I thought it was overkill, but each option is suited for an specific case: Illusion spells are your cheapest option, and as such are the best option whenever your enemies are vulnerable to it (I prefer using Fear, but in cases where you don't want to attract much attention Calm is better); Our grand staff of repulsion can be used to control lower level undead for free; Ash spells and paralyze are more taxing on your pool, but work against almost everything in the game, and can be used as a reliable control tool if all else fail; And finally, the Ice Form shout is a godsend if you run out of magicka or want to take many enemies out of the fight in a pinch.
Another thing we want to focus on all engagements is to hamper our opponents fighting capabilities as much as possible. We aim to put the fight in our terms, and that means making the fight as much of a burden to our opponents as we can. Frost spells makes enemy warriors less dangerous, as it messes with their ability to block and power attack; The whirlwind cloak is a fantastic tool to ragdoll enemies so our follower can hit with impunity; Paralyze is great for the same reason, being more suited in one-on-one situations (specially against hard-hitting enemies); The Marked for Death shout will make foes melt before our melee tank; And finally, the Grand Staff of Repulsion can be used to stun lock entire groups of higher level undead, making it invaluable in dungeons. Also worth of note is that after your controlling/debuffing is done, you may actually act as a secondary DPS with Jyrick's Staff (and later on, Magnus') to help close out fights faster, but it will depend on the situation.
One very important tool that wasn't mentioned so far is the Summon Familiar spell. While most people would consider it underwhelming, Alastor's Transient Sorcerer made me realize the potential and flexibility of the spell, and it is useful in many cases: it may become an on-demand invincible tank with ash shell; it is a distraction for enemies, which may buy you time to flee if needed or protect your follower from some hits; it is a good auxiliary DPS (specially with Marked for Death); it even may infect enemies with rockjoint, effectively debuffing their attack output; all in all a very useful resource in our arsenal.
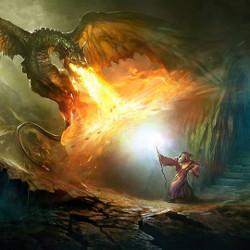
As you may have noticed, our follower doesn't carry a ranged weapon, which means we are the ones that need to deal with dragons. Thankfully, we excel at dealing with the overgrown lizards: the atronach stone can be combined with our breton racial power to make us immune to dragon breath; the lesser ward you learn from Tolfdir can also be used when the power is unavailable; The Staff of Jyrick is practically made for dragon hunting, with its crazy high attack speed, instant travel bolt, and magicka damage (which cuts their ability to shout); And the staff of Magnus can dry a dragon's magicka in seconds, effectively grounding him. Incidentally, this skill set also makes us a very good counter to enemy mages, a good complement for our melee tank.
Special Techniques
 Spectral Hunt
Marked for Death+Fear/Turn+Conjure Familiar
One of my favorite moves to deal with ranged threats. The high speed of the wolf will make sure it catches up with its fleeing (and defenseless) victim, while MfD makes sure even in the later stages of the game it can finish or heavily damage the foes you aim this at.

Earth shield
Follower/Summon Familiar+Ash Shell
Credit to Alastor for this neat trick. This move has plenty of uses: you may cast ash shell on your follower if he/she is about to be overwhelmed, buying you precious time to finish the opposition or figure out a plan while they hit your invincible tank; use it on your familiar if you are separated from your follower to get an on-demand meat-shield; or cast on the familiar even when with your follower so that he/she can focus more on the offense while the enemy foolishly hit the invulnerable wolf.

Soul of Oblivion
Summon Ash Guardian+Soul trap+Azura's Star
We use a lot of charge-hungry staffs and actually don't use black soul gems (more on that later). This move ensures we don't need to worry about souls, whether for enchanting or recharging ours and our follower's stuff. Simply cast the Ash guardian spell without a Heart Stone and proceed to defeat it and capture it's soul, whether yourself or by your follower.
 Barrage
Staff of Jyrick Gauldurson+Slow Time
This is reserved for when we are separated from our follower or when it has fallen and we need something dead asap. Combining the fast firing of the staff by tapping on the right rhythm with the slow time shout makes for some serious DPS when we need it. Just mind that the charges are very limited, so you might have to recharge a couple of times doing this (not a big deal thanks to Soul of Oblivion).

Siphon Magicka
Staff of Magnus+Lighning Cloak+Sparks+Atronach Stone+Dragonskin
An ultimate of sorts aimed at dragons and mages, but useful against other enemies as well. The staff of Magnus means you can cast sparks almost indefinitely, which combined with the cloak and the staff itself will drain the magicka of any target in seconds. From there, the staff will absorb health, turning this into a decent DPS move, specially against targets with a low magicka pool, meaning you can use this to either shut down spellcasters or bring the hurt to common enemies if the situation calls for it.

The guiding rule of the roleplay of this build is exploration/adventuring, and that translates well into the gameplay. Your character will crawl into dungeons very frequently for a myriad of reasons, but these are just your excuses: the true reason you will want to keep doing it is for the thrill of adventure itself. As such, I established a simple rule for myself: always explore a ruin, cave, etc. at least every two days. This opens a very interesting venue for you, as instead of going into dungeons for a specific quest or piece of equipment you are forced to go for the sake of it, meaning you'll go and explore a lot of places you'd have just passed by otherwise. Now, there are plenty of reasons to go dungeon crawling, many of which tie into the gameplay, that you may use as excuses for your character if you feel so inclined: get gear, new and more profitable enchantments and to fill soul gems. This last one is specially important and links really nicely to gameplay, as you'll frequently find yourself in need to refill soul gems, as power-leveling enchanting and recharging weapons will eat through your stock really fast.
While on the subject of soul gems, there is a very important piece of roleplay that helps glue many of these concepts together: never, EVER use black soul gems, and yeah, that includes the black star. In fact, dispose of any black soul gems you find (throwing them in the ocean for instance). The reasoning behind this is twofold: first, it is well established in TES lore that its use is taboo at least. It always seemed strange to me how basically every enchanter build worth its salt made use of them, sometimes even lawful builds, but we're breaking tradition here and establishing this is not a guy that is willing to use human souls in his work. Second, its use banalizes the adventuring process of enchanting. The reason black souls are so used is because the potency of the soul is unrelated to the difficulty to acquire it. A common bandit will yield the same charge as a mammoth or a dragon priest. What this means is you can get more high quality filled gems than you know what to do with while not taking many risks. By cutting their use, we essentially force ourselves to work, and work hard, to fetch those grand souls. This gives a lot more meaning and incentive to dungeon crawl, and more personality to our craft: it is one thing to enchant a weapon with the soul of a John Doe and forget about it, but to craft it with the soul of a legendary dragon priest is another ordeal. And while we do use a trick to get a stable font of greater souls (see Soul of Oblivion above), it is a manageable, but still tougher fight than your average bandit, and only yield a greater soul, that is more adequate to recharge staffs and weapons than to be used in crafting.
Speaking of crafting, try and name any artifacts you are doing that are not for grinding/money. This was especially meaningful when doing it for followers, as you may name the items based on their quirks and personality or after the foe you've slain to power the enchantment. I felt it was a really fun aspect of enchanting, and it adds character and accomplishment to the pieces you create. On this note, whenever I changed followers I always crafted a special gift or let them keep a piece of their gear that I felt reflected them. It is kind of awesome meeting them later still using that sword or cuirass you tailor made for them.

Mods
If you happen to be the proud owner of a PC, the following mods can really add to the experience of this build (don't worry, you console kids, the special edition is almost here upon us. There's not so much diversity, but there is really good stuff, still):
- Acquisitive Soul Gems Multithreaded (SE version): A much convenient mod, it will impede a soul from entering a soul gem if it is lesser than the soul gem's max capacity, aka, no more Grand Soul Gems loaded with petty souls. Crazy useful as our follower will be the one doing the soul harvest for us for the most part.
- Improved Staff Uses: Another great convenience mod, this will increase the charges on all our (not modded) staffs. As the soul charges it requires are also increased I don't see it much as a "cheat" mod, but rather a convenience one (not having to recharge all the time is quite nice, but it will come at the price of more soul gems spent to get the staff to full).
- Lost Grimoire and Apocalypse (SE version): Those spell packs are awesome, and imo a must have in any mage run. I avoided using the modded spells to get a better feel on how the build played in vanilla, but there are many tools those mods bring to the table that will flesh out and boost the way we play by opening up a ton of options. The spells also fit seamlessly into the world, and you may even run ASIS so enemies will use the them against you.
- Immersive College of Winterhold: A must have in any mod list that uses magic. It adds too much flavour and features for me to describe, but it's awesome, and as we will be running the College questline anyway, you might as well have it installed. You won't regret it, I guarantee.
Thanks and Final Thoughts
All in all, this build was a blast to play. I thought forcing myself to take the mantle of the support in a game that, in my opinion, is far more rewarding playing as a damage dealer would drain most of the fun out of the ordeal, but I'm most glad I was stubborn enough to prove myself wrong. The new perspective really added flavor to the experience, and made it all really fresh for me, unnusual in a game I've been playing for so damn long.
Huge shout-out to the great guys back at the Workshop for helping me put this together, and special thanks to Blacklight for the amazing perkspread. And of course, my thanks to you, dear reader, for taking your precious time to read, and perhaps play, this build. I hope you enjoy the ride as much as I did.
Cheers my good folk, and until the next one, if such is fated.
- Race: I went Breton: magic absorb/resist and automatic access to the Familiar summon (one of our most useful spells) sealed the deal for me. However, if you want to choose another race (Altmer comes to mind with their magicka and illusion boost), by all means, feel free to do so;
-
 This turned out awesome, Ponte. You know, there's something really cool about embracing the idea of being Alchemist or in this case Enchanter. And I really mean embracing the concept. They are scientists of sorts, explorers, and this build very well capitalizes that. It's not like many other builds that say "buy filled grand soul gems" but it instead focuses on going out and getting those souls. This vibe of adventure and exploration really resonates with me. And it's a buddy build. While Followers' AI sucks, I really like this style, where you go out with follower, support him and buff him - where you aren't the toughest son of a bitch in the neighborhood but instead make your follower just that. I say well done.
 -

-

This looks great Luck Ponte. I enjoy the challenge of not using black soul gems and you've introduced some fun concepts. This looks like a neat support build and I like builds that can really justify enchanting because I usually hate the skill with a passion.
I am still in love with the perkspread image.
Just a really nice, well put together build. You should be proud.
-

-

A support build that doesn't use Restoration? Fantastic! you did a great job Luck. Currently i've been a bit burned out on Enchanting but this build is on the list to play the next time i get that enchater itch.
Oh, i took the liberty to fix your tags so now the build will correctly link to the archives.
-
Overhate said:
The follower could use a greatsword, though :P
He totally could, it's all up to you =) However, your follower does miss out on some extra health and magic resistance from the shield enchantments. To be fair, there are many possible follower setups (conjurer mage, ranger+dog/Barbas, etc.) you could use that I just didn't detail because I couldn't fit in the build, but if you just adapt the enchanted set you craft them to match what they need you could roll with other follower types.
-
Vargr White-Tree said:
A support build that doesn't use Restoration? Fantastic! you did a great job Luck. Currently i've been a bit burned out on Enchanting but this build is on the list to play the next time i get that enchater itch.
Oh, i took the liberty to fix your tags so now the build will correctly link to the archives.
Thanks for the feedback and the tags, Vargr, I'm glad you liked it =)
-
-
Noodles said:
Hot damn. You used enchanting to make pump steroids into your followers. Nice, very nice! :D
That was pretty much the idea. Supportive enchanting, much like using positive poisons for supporting alchemy. Thanks Noodles =)