Skyrim Character Building » Discussions
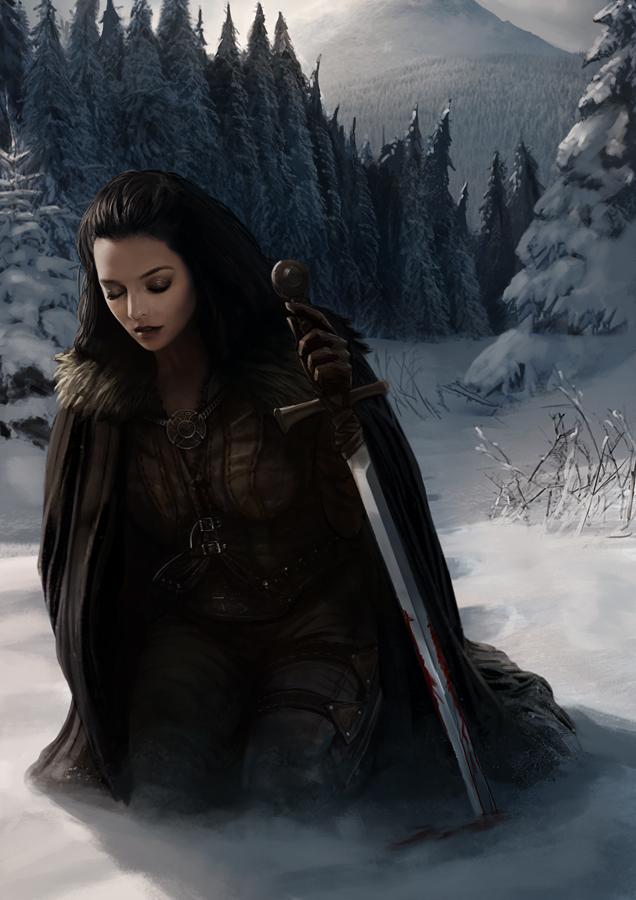
Character Build: The Immortal
Tags: #Character Build Spellsword #Character Build Juggernaut #Character Build Healer #Rank:Exemplar #TwistedOrthrusBuild #Swiggity swag check out this tag-
ShinJin likes this
-

One of my favourite builds on the site is Henson’s Old Orc. It ticks all the boxes for a great build but it has one thing that sets it aside from many of the other amazing creations on the site. It has perfect game play and role play for a Dead is Dead character. It inspired me to create my own dead is dead build.
The Immortal
Legend tells of the eight Dragon priests of Skyrim; how they met in the ancient city of Bromjunaar in a hidden sanctuary to lock away their most treasured mask. Only with all eight masks of the dragon priests, and one long forgotten present, could that mask be retrieved.
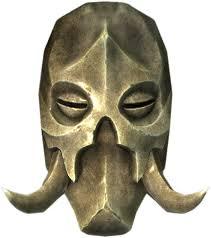
Konahrik
Warlord
Immortal
A warrior, riddled with sickness and close to death, discovers the missing mask. She sends her research assistant off ahead with it, too sick to keep up. She must travel to Skyrim. To the ruins of Labrynthian.
She will attain immortality, or die trying.
Race: Nord
Stone: Atronach
Stats: 0/1/0
Shout: Become Ethereal
Major Skills: Heavy Armor, Restoration, Smithing
Minor Skills: Destruction, One-handed
Weapons: Dragonbone Sword (best quality until then) Staff of Magnus, Assorted staffs.
Armor: Dragonbone armor, Konahrik, Savos Aren’s Amulet, Ring of Health (Blades armor is a good choice before Dragonbone)
Spells: Close Wounds, Wards, Lightning bolt, Poison Rune, Equilibrium
Powers and Effects: Waters of life, Ancient Knowledge, Force Without Effort
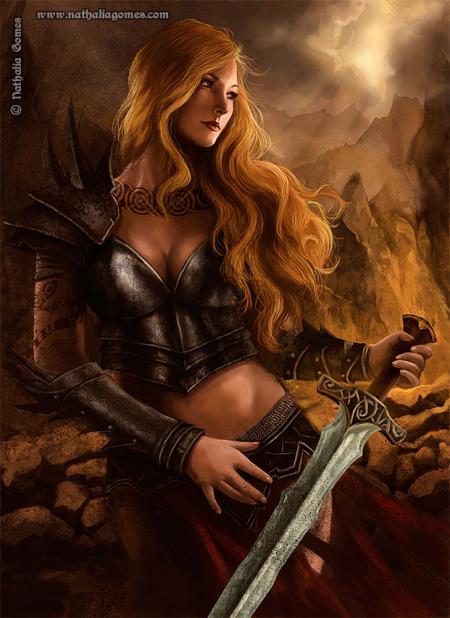
The Bringer of Justice by nathaliagomes
The Build
This build is the defensive beast it needs to be to survive dead is dead. Rather than dodging, the immortal focuses on taking hits well. Improved heavy armor allows the immortal to take a beating, that can be instantly shrugged off with a well-timed heal. Rather than using shields, the immortal casts wards just before a strike connects to bolster her heavy armor for a few seconds. It costs very little magicka and each time a ward is activated during combat will raise the restoration skill. Once your heavy armor hits the AR cap, this will no longer be necessary, but wards are still useful for blocking incoming spells, and absorbing magicka with ward absorb, which is particularly useful against dragons.
Lightning spells and swords cover the Immortal’s offence, making them deadly at long and close range. The magicka damaging effect of lightning spells helps tremendously against dragon priests. Ones without staffs become incredibly vulnerable when they have no form of attack. With an improved sword of the highest available quality, the immortal tears through enemies with ease
The only stat this build invests in is health. It makes surviving DiD much easier, but it also means that Konahrik and avoid death will start to trigger long before you hit 0 HP. Your magicka will hit 200 easily with the atronach stone and Savos Aren’s Amulet. The 50% chance to absorb incoming magicka is a great defence against the dragon priests and other enemies you’ll face, and the 50% slower magicka regen can be offset with two perks in recovery. With no points in stamina, the immortal relies on the respite perk to keep power attacking and sprinting.
With limited magicka, staves are an amazing tool for the immortal to utilise, with many of them coming from the dragon priests you hunt down. Hevnoraak’s staff and other wall staffs are great for dealing large groups in enclosed spaces, while fireball staffs are great ranged alternatives. The Immortal uses the staff of Magnus heavily. The magicka absorb effect, combined with the atronach stone is a great tool for levelling destruction and restoration through the use of rune spells.
Followers are essential to the immortal’s survival. Early levels it is best to take a warrior follower who can tank for you to some degree. Lydia, Uthgerd and Jennesa can all be convinced to follow you easily and are all in Whiterun. Once you have beefed up your defence to a certain extent (around level 15) you should swith to a mage follower and do the majority of tanking yourself. Marcurio is an amazing choice for this. He uses fire and lightning spells for dealing damage, will heal himself when necessary and will use turn undead spells on enemies weak enough to be affected.
Hunting the Dragon Priests
 (Note: I played this character on expert to level 11 and master after that, but am convinced it can be done entirely on master)
The aim of this character is to obtain Konahrik as soon as possible, which means killing off all eight dragon priests in Skyrim. No easy task, especially when playing DiD. Here are some tips I and others have come up with to make this all easier.
Knowing that Morokei and Nahkriin were locked behind the mage and main questlines respectively, I started both early so that by the time I’d dealt with the other priests, I could take them on. The remaining six I ranked by difficulty and would face two, improve my skills some more, then face another two.
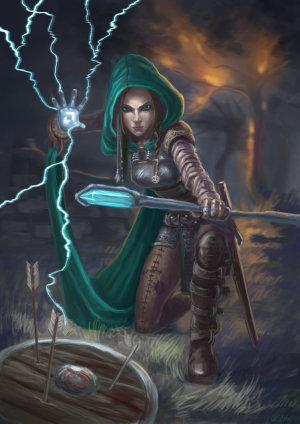
Volsung and Vokun were my first targets, between levels 8 and 11. Volsung can be reached without clearing Volskygge by climbing directly to the summit of the mountain to face him one on one in a fairly small area with good cover. With Vokun you gain Anska as an additional follower which improves your odds a lot. Her fireballs are a good distraction while you get in close or pepper him with spells. Next you want to take on Krosis and Otar, between levels 12 and 15 I’d suggest. Krosis seems like an easy target due to only having to fight a dragon to get to him, but with such a large open space for him to move around in, it is nearly impossible to get in close. A great tactic I used was to equip a healing spell in one hand and sparks or a staff in the other, using my 50% absorption to continuously heal while damaging Krosis. Otar is the first priest where getting to him is more of a problem than the actual fight. Be aware though that he can summon a storm atronach which can be a problem if you aren’t prepared. Around this time I went to Solstheim and picked up Waters of Life which was a huge lifesaver in these battles. (Image on the right is Battle Mage by CriAnn)
Hevnoraak and Rahgot are the toughest priests to tackle due to the tough enemies you have to face just to get to them. Hevnoraak was the most difficult priest for me, though I fought him before Otar in my playthrough. I’d suggest taking his dungeon slowly and possibly using a warrior follow to help with tanking. When it comes to fighting Henvoraak, use the same tactics I suggested for Krosis. Rahgot is a bit easier, although he has minions around him during the fight. I chose to retreat back through the ruins while taking out his draugr one at a time. When it is just down to him, you should have no trouble. I beat these two before level 20.
By this point you should have progressed the college and main questlines so that you can face Morokei and Nahkriin. I chose to face Nahkriin first since Morokei is so conveniently placed. Besides having to face Skuldafn alone, this priest is fairly easy if you get in close before he can reach his staff. By the time you go to face Morokei, you should be a dominating force and will be able to handle him and the rest of Labrynthian with ease. Once he lies dead, collect the final mask and unite them all at Bromjunaar sanctuary to receive Konahrik around level 25.
After this, you’ll need to consolidate your immortality. I finished training my defensive skills, as well as going hunting for some more useful staves. The main goal I had was to eliminate the dragon priest on Solstheim so that I had no one who could threaten me, as well as any other powerful enemies.
Restoration levels quickly early, tapping wards to apply armor as you take hits. At later levels, poison rune, heal other and circles of protection will all bring you to 90 quickly, so that you can get avoid death ASAP. Respite will make up for having no stamina investment while regeneration improves your healing.
Heavy armor levelled very quickly on this build. Using wards gives you the confidence to take hits and keep on fighting. I stopped at tower of strength to decrease the time I was staggered for. Ancient knowledge is a power you want to pick up for a huge AR boost. The effect is broken and doesn't work properly, it instead increases the AR of all non-dwarven heavy armor pieces by 25%.
Smithing helps you to reach the AR Cap much sooner and can be a great way to earn money. Dwarven smithing is needed for training, Arcane blacksmith for improving dragon priest masks, and dragon smithing to get our end game gear. I used Blades armor up until then for its high AR. Around level 47, consider getting the black market power to buy some enchanted dragon plate. I would suggest enchantments which improve health, magicka and stamina, in that order.
One-handed and destruction are both straight forward. With destruction I focused on lightning magic for dealing with mages, dragon priests in particular. One-handed I just took perks to improve damage and reduce stamina cost of power attacks. I took enchanting to get better recharge cost on staves, though this is entirely optional.
Special Moves
Erupt: Use the staff of magnus to absorb an enemy’s magicka, while repeatedly casting lightning or poison runes. Great for levelling restoration or destruction.
Invigorate: When your health is low, Konahrik has a 15% chance to heal you and apply a flame cloak. On top of this, it has an additional 3% chance to apply both those effects, as well as summoning a ghostly dragon priest to fight alongside you. As you’d expect, with a 50% chance to absorb magicka from the atronach stone, that 3% is reduced to 1.5%, with the remaining 1.5% being a chance to absorb enough magicka to return I your tank to full. Throw in respite, and the mask has a 1.5% chance to restore all of your stats when on low health.


-

-

-
 You did a great job with the build, but perhaps you should add in some more story and role play aspects. For example what happens to the "Nord Warrior riddled with sickness," does the character achieve immortality just by claiming this mask, or does she perhaps find out that the mask only makes her hard to kill but that it doesn't elongate her life. In that case maybe she seeks out alternate means, such as vampirism. Also for role play why not give the character a disease and make them play with that handicap the whole game until they get Konariik. I guess I'm just trying to say put a little more effort into the story, but over all great build. Keep up the great work!
 -

Glad to see that your DiD playthrough made it to completion. The build is great as well. That being said, I have a few minor nitpicks. First off, you might want to point out which Dragon Priest Masks ate good to use before you get Kony. Otar and Rahgot would both be quite useful, I'd imagine, as well as Nahkriin if it weren't for the fact that it'll likely be the second to last mask you get.
(Note: I played this character on expert to level 11 and master after that, but am convinced it can be doe entirely on master)ll eight dragon priests in Skyrim. No easier task; especially when playing DiD. Here are some tips I and others have come up with to make this all easier.
Not sure what you were trying to say there. :P
You're slightly incorrect on how Ancient Knowledge works; it boosts the AR of all heavy armor pieces (except for Dwarven with the 1.9 patch) by 25% regardless of how many pieces of heavy armor you have equipped. This boost also applies to heavy armor shields as well. Of course, since you're using a complete set of heavy armor with this build, my point is irrelevant with regards to this build, but I thought I'd point it out anyway.
You mention that Blades Armor only needs Steel Smithing to be improved, but it doesn't actually benefit from any smithing perks. It's the Blades Sword, not the armor, that benefits from Steel Smithing. In other words, you'd be better off using Steel – Daedric Armors until you reach Dragonbone since you can double the improvement on them with the relevant smithing perk, unlike Blades Armor.
Finally, my comment that I left on your Sun-Eater (regarding how you end your builds) also applies here. You should keep using that banner of yours. :P
Regardless of the points I've brought up, this build turned out great. Excellent work!
-

This one, I have been waiting for this ever since you started playing the build. I wish you'd include the stories of your companions deaths in some way (all 23 of them or whatever
 ) but I will live.
I like DiD although I am too lazy to play it but I might give it a go now, with this and the Old Orc up we need a heavy duty Mage cutting through with low Health trying not to die. Anyway Twisted you can receive my +1 for this build as well.
-

I love the concept (and DiD runs as a general rule). Chasing dragon priests is one of my favourite pass-times after all. However I think I for one would like to have a bit more background information. bUt here is what I could make from what you have alreadyd one:
-Your character is sick and has heard of a dragon priest mask that could help her overcome her disease.
-You send out a servant to go look for it (this is suposedly the guy outside Bromjunaar (with the wooden mask) But he dies and is never heard of again.
-You decide that you'll have to take matters upon your own hands beacause otherwise you'll be dead before even laying eyes upon the mask.
While it is indeed not a lacking description I would like to know how the character acquired her skillset, where she learned using her weapons, or at least how the hell she heard about the dragon priests.
Anyway, congrats on the recognized and have my like, you deserve it with this nice and concise DiD build.
-
Thanks Albino, and sorry for making you and everyone else wait so long for a reply.
You are 100% right about the masks I used on the way to get Kony. I actually found Nahkriin to be very useful on the way through Labrynthian so it isn't a total disappointment.
That paragraph you quoted is very messed up and will be fixed first thing tomorrow.
Another big thank you for the corrections on blades armor and ancient knowledge. I will say that Blades armor was still more effective, at least until Orcish became available even without the smithing boost. I only used Orcish for about two levels before I got my Dragon armor so it hardly seems worth mentioning.
-
-
 I expected highlander stuff... I am disappointed...